

A Bluetooth connection is easier to test while the Suzuki Swift is parked than after you set off. For pairing Bluetooth in a Suzuki Swift rental car, open the vehicle’s Bluetooth or phone menu, make the car discoverable, then select it in your phone’s Bluetooth settings. Follow the pairing prompts on both screens, as menu names and steps can vary by model year.
It’s worth separating phone calls from music: a connection that supports hands-free calls may not play audio in the same way. This guide explains how to prepare your phone, find the car’s Bluetooth settings, respond to pairing requests, and troubleshoot common connection or sound issues. You’ll also learn how to test the connection while parked and remove your phone from the car’s saved devices when your rental ends.
Key Takeaways
- Look for a Phone or Bluetooth option in the vehicle’s audio menu; the exact path can vary by Swift model year.
- Compare the pairing code shown on both screens, then choose which phone permissions to allow.
- Turn on Bluetooth and keep your phone unlocked during setup so you can respond to prompts promptly.
- If connection or sound fails, check the audio source and call or media settings, then try pairing again while parked.
Finding the vehicle’s Bluetooth menu
For pairing Bluetooth in a Suzuki Swift rental car, first identify the model year and installed audio unit. Menu names and controls can differ, so use the screen and buttons in front of you rather than assuming every Swift follows the same steps.
The pairing instructions for a 2002 Suzuki Swift apply to that model, not automatically to every Swift. A listing that covers model years 2000 through 2004 doesn’t make one menu path universal.
- Check the vehicle’s model year and look at the stereo before navigating its menus. This helps you avoid applying 2002 instructions to a different Swift.
- Park before exploring the audio unit, then look for a Phone, Bluetooth, Setup, or Menu control. These labels can help you locate the connection settings.
- Open the Bluetooth or phone section and look for an option such as Pair, Add device, or Register device. Select the displayed option to make the car ready for connection.
- Use the vehicle’s own screen prompts to continue, rather than relying on a remembered button sequence. A touchscreen and a stereo with physical controls may present settings differently.
- Check the device name shown by the car before selecting it on your phone. This helps distinguish the Swift’s audio unit from other nearby Bluetooth devices.
- Treat video demonstrations as model-specific, not as universal Swift instructions. A video showing a 2013 Suzuki Kizashi GTS 2.4L 4 Cyl. doesn’t show a Suzuki Swift.
Once you find the Bluetooth menu, keep the car parked while you continue setup. This gives you time to respond to prompts and test the connection before driving. If the labels differ from these examples, return to the main audio screen and check the Phone or Setup options. The exact route depends on the fitted unit, so follow the prompts displayed in the vehicle.
Pairing codes and permissions
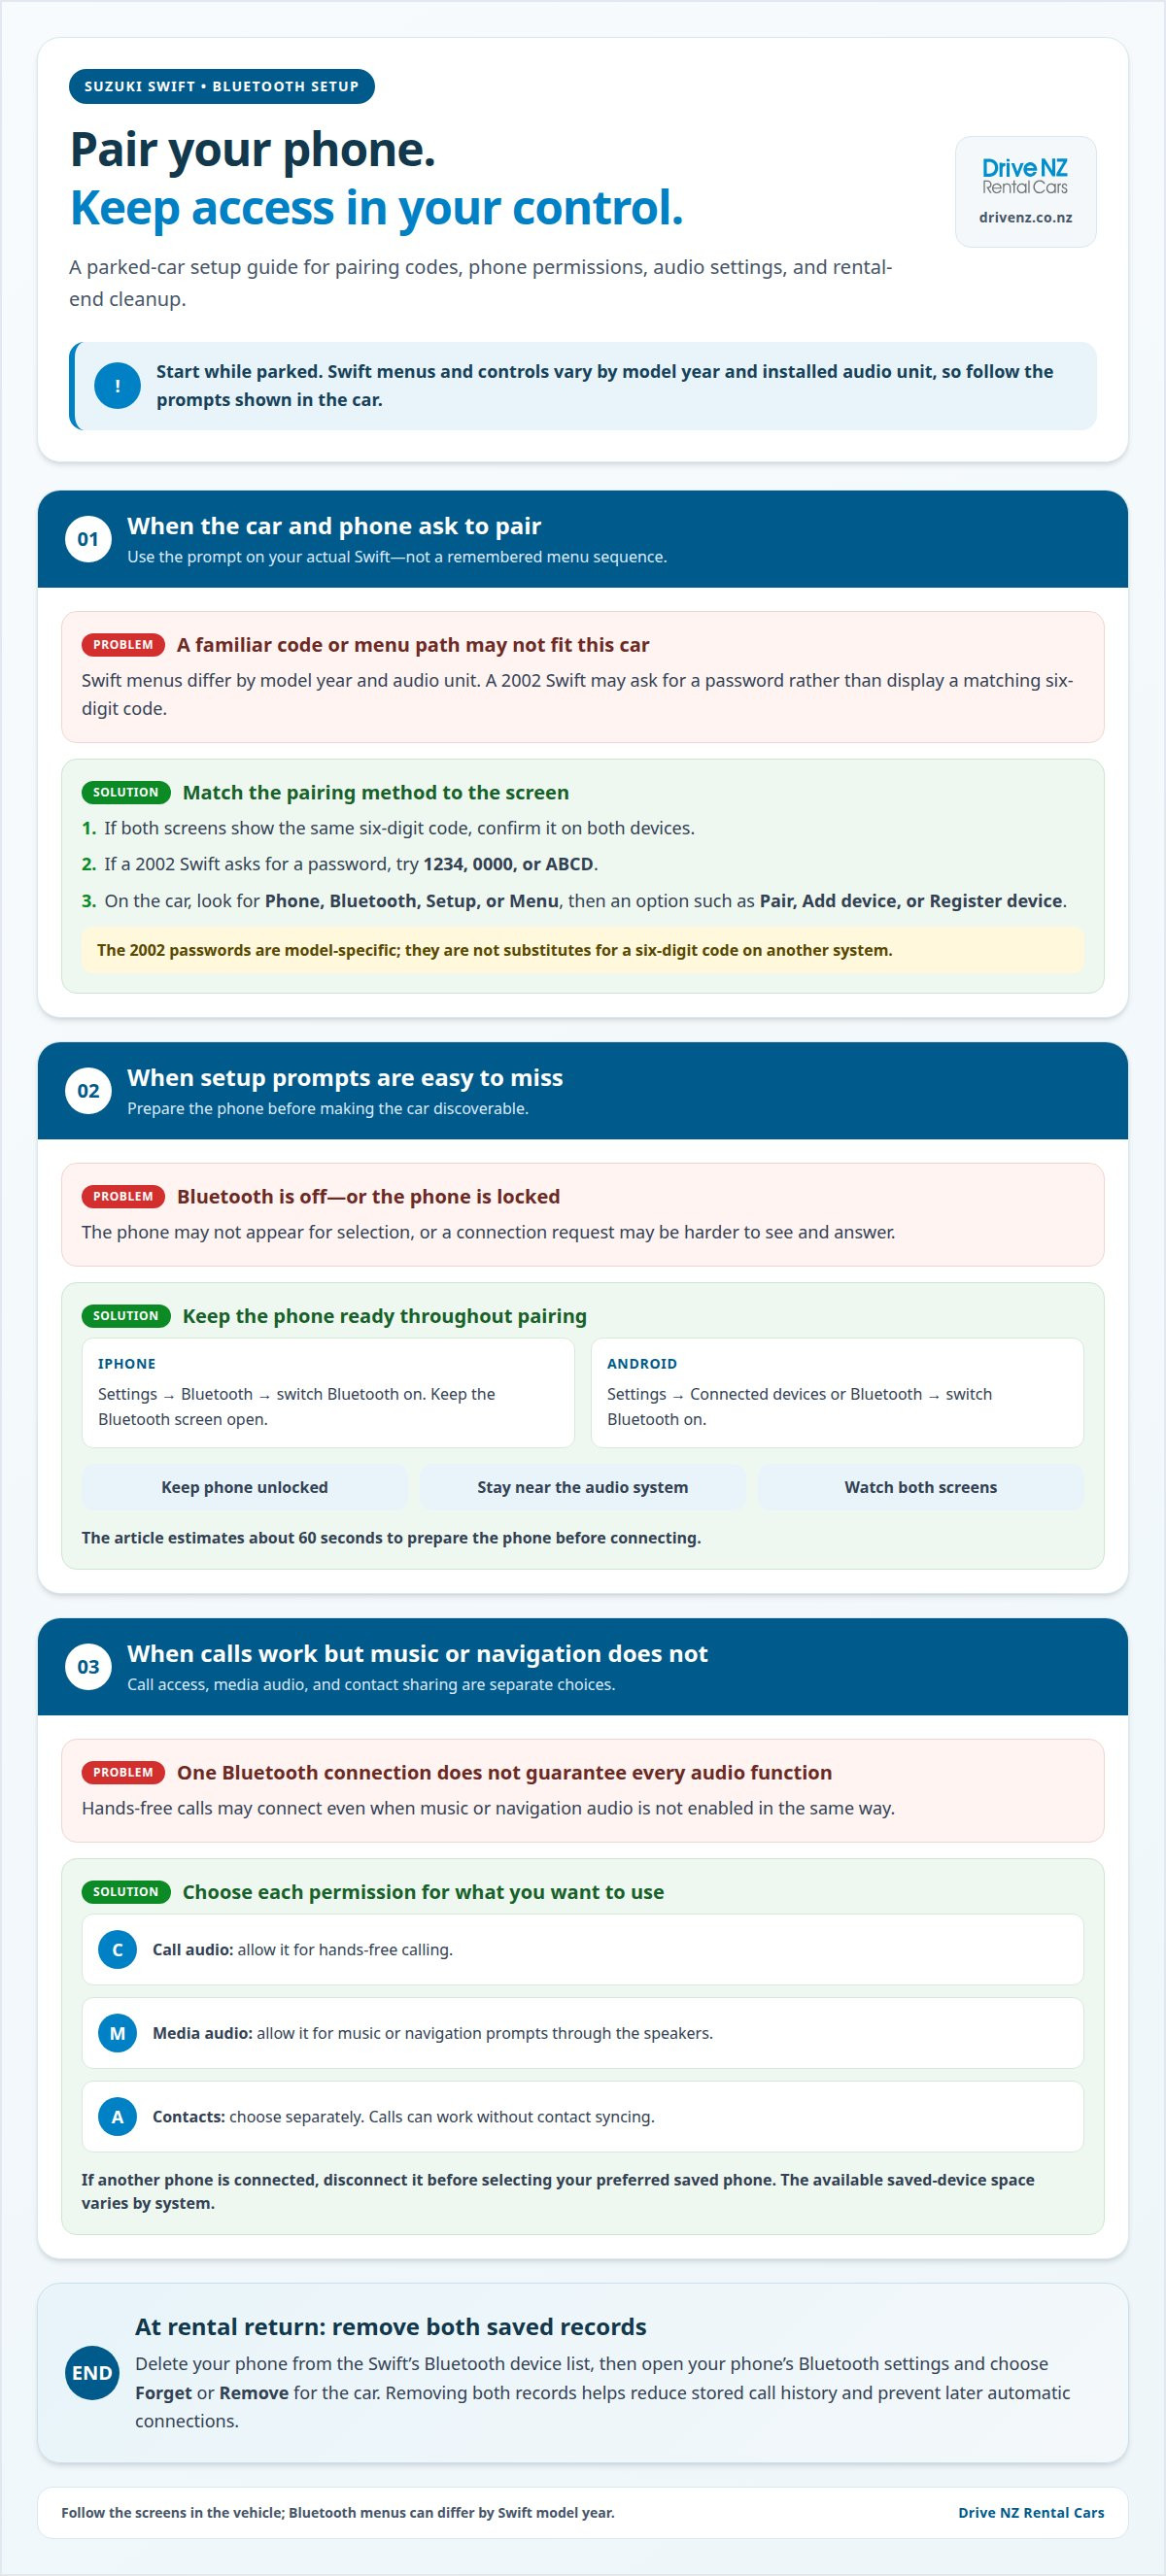
To pair a phone with Bluetooth in a Suzuki Swift, select the car in your phone’s Bluetooth settings and follow the prompts. If both screens show the same six-digit code, confirm it on each device to complete pairing.
Use the prompt that appears on your actual Swift. A 2002 Swift may request a password instead of showing a matching code. For that model, try 1234, 0000, or ABCD if prompted. These passwords are not substitutes for a six-digit code on a different system.
- Check both screens. Matching six-digit codes confirm that your phone is pairing with the intended vehicle.
- Accept the connection request. Confirm the code or password on the phone and car when prompted.
- Choose call access separately. Allow calls if you want hands-free calling through the car.
- Decide about contacts. You can allow calls while denying contact syncing, so calls can work without sharing your address book.
- Review each permission prompt. Select only the access you want, since call access and contact sharing are separate choices.
A Swift can save more than one phone, but the available device space varies by system. If the car has reached its saved-phone limit, delete an old entry before adding another device.
To switch phones, open the car’s saved Bluetooth devices and select the phone you want to connect. If another phone is still connected, disconnect it first, then choose your preferred device. The screen’s device list determines which saved phone connects.
For a rental journey, pairing only the phone you plan to use keeps the device list straightforward. If you’re arranging transport for your trip, explore rental car options alongside your Bluetooth setup.
When setting up a rental car, the rental-car and phone screens will usually display the same 6-digit pairing code for confirmation.
Preparing phone settings before pairing
Take about 60 seconds to prepare your phone before connecting it to the Suzuki Swift. Turn on Bluetooth, keep the phone unlocked, and watch for prompts while pairing. Starting with these settings ready makes it easier to complete setup without missing a request.
On an iPhone, open Settings, select Bluetooth, and switch Bluetooth on. Keep the Bluetooth screen open while you select the car and respond to its prompts.
On an Android phone, open Settings, go to Connected devices or Bluetooth, and turn Bluetooth on. Keep the phone unlocked as you select the Swift’s audio system and accept its connection prompts.
- Turn Bluetooth on before opening the car’s pairing screen. The phone can then detect the vehicle when it becomes available.
- Keep your phone unlocked during setup. An unlocked screen makes connection prompts easier to see and answer.
- Stay on the Bluetooth settings screen. This lets you follow the phone’s connection status as the car appears.
- Check the car’s Bluetooth settings on your phone after pairing. Confirm that call audio is enabled if you want to make hands-free calls.
- Allow media audio if you want music or navigation prompts through the speakers. The phone’s Bluetooth options can control call and media audio separately.
- Choose contact access according to your preference. Calls can work without contact syncing, so you can deny access to your contacts.
- Keep the phone near the vehicle’s audio system during setup. This makes it easier to see the device name and respond to both screens.
Before returning the rental, remove your phone from the Swift’s Bluetooth device list, then forget the car in your phone’s Bluetooth settings. Removing both records helps reduce stored call history and prevent later automatic connections. Many vehicle hire companies, including fleets like Al Hurr Car Rental, advise clearing personal device data prior to handover so your information remains private.
On an iPhone or Android phone, open Bluetooth settings, select the paired car, and choose Forget or Remove. Then use the Swift’s Bluetooth menu to delete the saved phone entry, so the rental system no longer lists your device. Reputable car hire services such as luganocar.com highlight this step as standard practice to protect your privacy after any vehicle rental.
Troubleshooting failed pairing and audio
If pairing fails, check the car’s connection state before changing your phone settings. Some infotainment systems require the vehicle to be on or the handbrake engaged. Keep the Swift parked while you work through these checks.
- Meet the car’s pairing conditions. Turn the vehicle on or engage the handbrake if its system requires it.
- Check for a full saved-device list. Delete an old phone from the car’s Bluetooth menu if the memory is full.
- Clear the failed pairing from both devices. Remove the car from your phone and delete the phone from the vehicle’s list.
- Restart Bluetooth on your phone. Turn it off, then on again before trying to pair while the car is discoverable.
- Check call and media permissions separately. Enable both if you want calls, music, and navigation prompts through the speakers.
- Choose the correct audio source. After connecting, select Bluetooth Audio or Media on the car stereo.
A successful phone connection doesn’t always mean music will play. Bluetooth may support hands-free calls, while music playback depends on the Swift’s audio system. Some systems require an input jack for phone music. If calls work but music doesn’t, first check the car’s source selection and media-audio setting.
Test a call while parked. Listen for clear sound through the speakers, then check whether the microphone picks up your voice. Adjust the speaker volume and listen for echo before driving. A test call can reveal an issue that music playback won’t expose.
If the phone pairs but the audio still fails, repeat the checks in order: permissions, selected source, then device removal and fresh pairing. This separates a media-setting issue from a connection problem. For your next trip, plan your rental after confirming the audio setup that suits you.
Drive NZ Rental Cars
Drive NZ Rental Cars offers practical vehicle options for planning a trip, including Compact Hatchbacks, Intermediate Sedans, and Compact SUVs. After reviewing the Bluetooth steps, choose a vehicle category that suits your travel plans, then follow the audio system’s displayed prompts in the car you collect. Bluetooth menus and pairing steps can vary by model year and infotainment system, so use the controls fitted to your vehicle rather than assuming every car works like a Swift.
Snow Chains are also available for winter travel. Choose the vehicle option that fits your journey, and prepare your phone for setup while parked.
Contact Drive NZ Rental Cars to discuss your rental plans.
Set Up a Smoother Start to Your Trip
Make your first stop about settling into the car, not adjusting settings on the move. Pairing Bluetooth in a Suzuki Swift rental car can be part of a simple pre-departure routine, alongside setting your route and choosing your audio. Once you’re ready, focus on the journey and leave further adjustments until you’re safely parked.
Your rental choice can also shape how you plan the drive. Consider who’s travelling, how much space you need, and the routes on your itinerary. A little preparation helps you focus on the trip instead of sorting out small details after departure.
For a rental that fits your plans, contact Drive NZ Rental Cars. Get your travel arrangements in place, then start the journey feeling ready and at ease.
Frequently Asked Questions
Where is the Bluetooth or phone menu in a Suzuki Swift?
Look in the audio system’s Phone, Bluetooth, or Setup menu. On a Swift with physical stereo controls, check the labelled buttons around the display; on a touchscreen, look through its on-screen menu. The exact route depends on the fitted system and model year. If the display is showing a radio station, return to the main audio screen to find connection settings.
What should I do if my phone cannot find or pair with the Suzuki Swift?
First, check whether the car appears in your phone’s available-device list or pairing starts but fails at confirmation. If the car doesn’t appear, make it discoverable in its Bluetooth menu and refresh the phone’s list. If confirmation fails, remove the incomplete connection from both devices, restart Bluetooth on your phone, and try again with the car ready to pair.
Does pairing Bluetooth in a rental car require a PIN or passkey?
It depends on the Swift’s audio system: some display a matching six-digit code on both screens, while an older unit may request a password. For a 2002 Suzuki Swift asking for a password, try 1234, 0000, or ABCD. Enter or confirm only what the vehicle’s prompt requests; don’t treat those older passwords as substitutes for a displayed matching code.
Can I use Bluetooth for calls and music in a Suzuki Swift?
Bluetooth can support hands-free calls, but music playback depends on the Swift’s audio system. Calls may work while music doesn’t, for example, or the stereo may need its source changed to Bluetooth Audio or Media. If the car supports calls but not Bluetooth music, an input jack may be needed for phone audio. Test each function separately while parked.


